
Run UTFT_Demo Example using
Arduino MEGA 2560 Board
For UTFT_demo example open “UTFT-->example-->arduino avr-->UTFT_Demo_480x320.ino.”
Note:you must have to put “UTFT” and “UTouch” folder in to Arduino libraries folder like shown in image.before this remove the older "UTFT and "UTouch" folder from same directory if present.
Note:you must have to put “UTFT” and “UTouch” folder in to Arduino libraries folder like shown in image.before this remove the older "UTFT and "UTouch" folder from same directory if present.


If you don’t have per-installed Arduino IDE go to Download Arduino IDE

Now open UTFT_Demo_480x320.ino example and select the
board Arduino mega.go to"Tools-->Board-->Arduino mega 25260" like shown in image below. 
Now compile the sketch and run sketch on board.
Arduino Code:
------------------------------------------------------------------------------------------------------------------------------------------
#include <UTFT.h>
// Declare which fonts we will be using
extern uint8_t SmallFont[];
// Set the pins to the correct ones for your development shield
// ------------------------------------------------------------
// Arduino Uno / 2009:
// -------------------
// Standard Arduino Uno/2009 shield : <display model>,A5,A4,A3,A2
// DisplayModule Arduino Uno TFT shield : <display model>,A5,A4,A3,A2
//
// Arduino Mega:
// -------------------
// Standard Arduino Mega/Due shield : <display model>,38,39,40,41
// CTE TFT LCD/SD Shield for Arduino Mega : <display model>,38,39,40,41
//
// Remember to change the model parameter to suit your display module!
UTFT myGLCD(CTE32HR,38,39,40,41);
void setup()
{
randomSeed(analogRead(0));
// Setup the LCD
myGLCD.InitLCD();
myGLCD.setFont(SmallFont);
}
void loop()
{
int buf[478];
int x, x2;
int y, y2;
int r;
// Clear the screen and draw the frame
myGLCD.clrScr();
myGLCD.setColor(255, 0, 0);
myGLCD.fillRect(0, 0, 479, 13);
myGLCD.setColor(64, 64, 64);
myGLCD.fillRect(0, 306, 479, 319);
myGLCD.setColor(255, 255, 255);
myGLCD.setBackColor(255, 0, 0);
myGLCD.print("* 4th Dimension Innovations *", CENTER, 1);
myGLCD.setBackColor(64, 64, 64);
myGLCD.setColor(255,255,0);
myGLCD.print("www.jaipraji.com", CENTER, 307);
delay(3000);
myGLCD.setColor(0, 0, 255);
myGLCD.drawRect(0, 14, 479, 305);
// Draw crosshairs
myGLCD.setColor(0, 0, 255);
myGLCD.setBackColor(0, 0, 0);
myGLCD.drawLine(239, 15, 239, 304);
myGLCD.drawLine(1, 159, 478, 159);
for (int i=9; i<470; i+=10)
myGLCD.drawLine(i, 157, i, 161);
for (int i=19; i<220; i+=10)
myGLCD.drawLine(237, i, 241, i);
delay(3000);
// Draw sin-, cos- and tan-lines
myGLCD.setColor(0,255,255);
myGLCD.print("Sin", 5, 15);
for (int i=1; i<478; i++)
{
myGLCD.drawPixel(i,159+(sin(((i*1.13)*3.14)/180)*95));
}
myGLCD.setColor(255,0,0);
myGLCD.print("Cos", 5, 27);
for (int i=1; i<478; i++)
{
myGLCD.drawPixel(i,159+(cos(((i*1.13)*3.14)/180)*95));
}
myGLCD.setColor(255,255,0);
myGLCD.print("Tan", 5, 39);
for (int i=1; i<478; i++)
{
myGLCD.drawPixel(i,159+(tan(((i*1.13)*3.14)/180)));
}
delay(3000);
myGLCD.setColor(0,0,0);
myGLCD.fillRect(1,15,478,304);
myGLCD.setColor(0, 0, 255);
myGLCD.setBackColor(0, 0, 0);
myGLCD.drawLine(239, 15, 239, 304);
myGLCD.drawLine(1, 159, 478, 159);
delay(3000);
// Draw a moving sinewave
x=1;
for (int i=1; i<(478*15); i++)
{
x++;
if (x==479)
x=1;
if (i>479)
{
if ((x==239)||(buf[x-1]==159))
myGLCD.setColor(0,0,255);
else
myGLCD.setColor(0,0,0);
myGLCD.drawPixel(x,buf[x-1]);
}
myGLCD.setColor(0,255,255);
y=159+(sin(((i*0.7)*3.14)/180)*(90-(i / 100)));
myGLCD.drawPixel(x,y);
buf[x-1]=y;
}
delay(3000);
myGLCD.setColor(0,0,0);
myGLCD.fillRect(1,15,478,304);
// Draw some filled rectangles
for (int i=1; i<6; i++)
{
switch (i)
{
case 1:
myGLCD.setColor(255,0,255);
break;
case 2:
myGLCD.setColor(255,0,0);
break;
case 3:
myGLCD.setColor(0,255,0);
break;
case 4:
myGLCD.setColor(0,0,255);
break;
case 5:
myGLCD.setColor(255,255,0);
break;
}
myGLCD.fillRect(150+(i*20), 70+(i*20), 210+(i*20), 130+(i*20));
}
delay(3000);
myGLCD.setColor(0,0,0);
myGLCD.fillRect(1,15,478,304);
// Draw some filled, rounded rectangles
for (int i=1; i<6; i++)
{
switch (i)
{
case 1:
myGLCD.setColor(255,0,255);
break;
case 2:
myGLCD.setColor(255,0,0);
break;
case 3:
myGLCD.setColor(0,255,0);
break;
case 4:
myGLCD.setColor(0,0,255);
break;
case 5:
myGLCD.setColor(255,255,0);
break;
}
myGLCD.fillRoundRect(270-(i*20), 70+(i*20), 330-(i*20), 130+(i*20));
}
delay(3000);
myGLCD.setColor(0,0,0);
myGLCD.fillRect(1,15,478,304);
// Draw some filled circles
for (int i=1; i<6; i++)
{
switch (i)
{
case 1:
myGLCD.setColor(255,0,255);
break;
case 2:
myGLCD.setColor(255,0,0);
break;
case 3:
myGLCD.setColor(0,255,0);
break;
case 4:
myGLCD.setColor(0,0,255);
break;
case 5:
myGLCD.setColor(255,255,0);
break;
}
myGLCD.fillCircle(180+(i*20),100+(i*20), 30);
}
delay(3000);
myGLCD.setColor(0,0,0);
myGLCD.fillRect(1,15,478,304);
// Draw some lines in a pattern
myGLCD.setColor (255,0,0);
for (int i=15; i<304; i+=5)
{
myGLCD.drawLine(1, i, (i*1.6)-10, 304);
}
myGLCD.setColor (255,0,0);
for (int i=304; i>15; i-=5)
{
myGLCD.drawLine(478, i, (i*1.6)-11, 15);
}
myGLCD.setColor (0,255,255);
for (int i=304; i>15; i-=5)
{
myGLCD.drawLine(1, i, 491-(i*1.6), 15);
}
myGLCD.setColor (0,255,255);
for (int i=15; i<304; i+=5)
{
myGLCD.drawLine(478, i, 490-(i*1.6), 304);
}
delay(3000);
myGLCD.setColor(0,0,0);
myGLCD.fillRect(1,15,478,304);
// Draw some random circles
for (int i=0; i<100; i++)
{
myGLCD.setColor(random(255), random(255), random(255));
x=32+random(416);
y=45+random(226);
r=random(30);
myGLCD.drawCircle(x, y, r);
}
delay(3000);
myGLCD.setColor(0,0,0);
myGLCD.fillRect(1,15,478,304);
// Draw some random rectangles
for (int i=0; i<100; i++)
{
myGLCD.setColor(random(255), random(255), random(255));
x=2+random(476);
y=16+random(289);
x2=2+random(476);
y2=16+random(289);
myGLCD.drawRect(x, y, x2, y2);
}
delay(3000);
myGLCD.setColor(0,0,0);
myGLCD.fillRect(1,15,478,304);
// Draw some random rounded rectangles
for (int i=0; i<100; i++)
{
myGLCD.setColor(random(255), random(255), random(255));
x=2+random(476);
y=16+random(289);
x2=2+random(476);
y2=16+random(289);
myGLCD.drawRoundRect(x, y, x2, y2);
}
delay(3000);
myGLCD.setColor(0,0,0);
myGLCD.fillRect(1,15,478,304);
for (int i=0; i<100; i++)
{
myGLCD.setColor(random(255), random(255), random(255));
x=2+random(476);
y=16+random(289);
x2=2+random(476);
y2=16+random(289);
myGLCD.drawLine(x, y, x2, y2);
}
delay(3000);
myGLCD.setColor(0,0,0);
myGLCD.fillRect(1,15,478,304);
for (int i=0; i<10000; i++)
{
myGLCD.setColor(random(255), random(255), random(255));
myGLCD.drawPixel(2+random(476), 16+random(289));
}
delay(3000);
myGLCD.fillScr(0, 0, 255);
myGLCD.setColor(255, 0, 0);
myGLCD.fillRoundRect(160, 70, 319, 169);
myGLCD.setColor(255, 255, 255);
myGLCD.setBackColor(255, 0, 0);
myGLCD.print("That's it!", CENTER, 93);
myGLCD.print("Restarting in a", CENTER, 119);
myGLCD.print("few seconds...", CENTER, 132);
myGLCD.setColor(0, 255, 0);
myGLCD.setBackColor(0, 0, 255);
myGLCD.print("Runtime: (msecs)", CENTER, 290);
myGLCD.printNumI(millis(), CENTER, 305);
delay (10000);
}
------------------------------------------------------------------------------------------------------------------------------------------
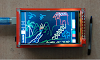
After successful compiling plugin display on arduino mega
board and attach it with desktop or laptop and select the COM port generated by
arduino mega board from “tools-->port” and upload the sketch on Arduino MEGA 2560 board. You
can see the some graphics on display.


8 Comments
sir link for utft.h and tuch library link please
ReplyDeletefor library click on "Software library Download ".
ReplyDeletehow many pins on the arduino mega are usable AFTER i plug this screen in? will i have enough pins left to connect a esp and a few sensors?
ReplyDeletecheck the pinout of display on:https://drive.google.com/file/d/0B6y6aBrbBZPpWVBXVXd3VlNsVkE/view
ReplyDeleteIs this display need adapter pcb to plug it to Arduino Mega2560?
ReplyDeleteno any extra board required for this display. you can directly connect with mega or due board.
DeleteDear Janak,
ReplyDeleteCan you please provide sketch demonstrated in 'application video'?
Please mail it on parveen.nasa@gmail.com if possible.
Thanks.
i want to ask a problem, can you fix problem like this(https://www.dropbox.com/s/ee0glpmc6ojgqui/WhatsApp%20Image%202017-11-11%20at%202.27.47%20AM.jpeg?dl=0)?? please help me thank you
ReplyDelete